With 1 TB of cloud storage available via Microsoft’s OneDrive for Business, you can solve your backup and remote working needs in one go!
This article shows you how to redirect your “My Documents” folder to OneDrive. This will save you having to backup your My Documents folder and will also give you anywhere access to your folders and files.
Ok let’s get started (i’m using Windows 7 Pro):
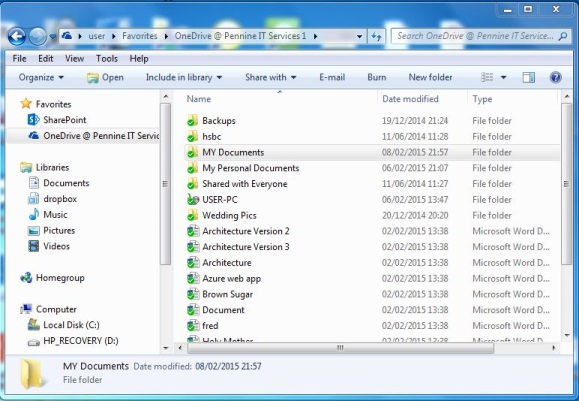
1. Create a folder in your OneDrive sync folder called “My Documents”:

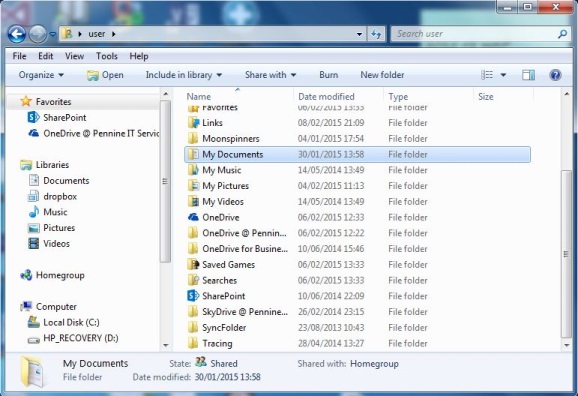
2. Open Windows Explorer, navigate to your User folder by clicking the Start button and then clicking your username (in this case my user profile is “User”). Highlight the My Documents Folder:

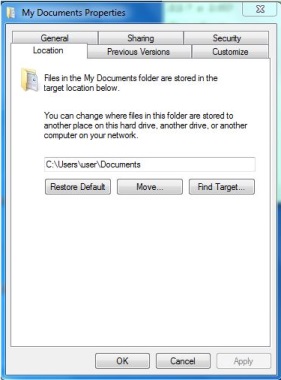
3. Right click on “My Documents”, select “properties” and the “Location” tab:

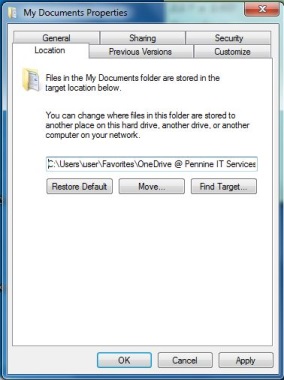
4. Change the location to the path for the “My Documents” folder you created in OneDrive in step 1:

5. Click “Apply” and “OK”.
There you go! You have redirected your “My Documents” folder to OneDrive, giving automatic cloud backup and anywhere access for your My documents folders and files.
Don’t worry if you may sometimes not have internet access, you’ll still be able to get access to your files and folders via the local sync library cache. When you next get internet access any changes you have made will automatically update to OneDrive.
OneDrive for Business is one of the tools you get via an Offoce 365 subscription. If you aren’t an Office 365 user, you can subscribe to OneDrive for Business for just £3.10 per month via this link (you even get a free trial!)
